
This first adventure with the Cicerone has come to an end: the results of the Tasting & Demo exam formally made me a Certified Cicerone® with a total score of 96%.
This post is about the Tasting portion of the Tasting and Demo exam, where I got a stunning 100%! For more advice on how to tackle the whole Certified Cicerone® certification, I put together a dedicated area of the blog.
This part of the exam was not extremely difficult, but neither was it immediate. I certainly capitalised on the experience gained over the last few years, part of which was consolidated thanks to the BJCP exams. I also brushed up on the off-flavours thoroughly and trained for the small oral demonstration. In any case, it went well. Very well.
Let’s look at the most critical passages of the Tasting exam and how to best approach them.
Training your palate is key, but recognizing and managing your own limitations is what truly makes the difference
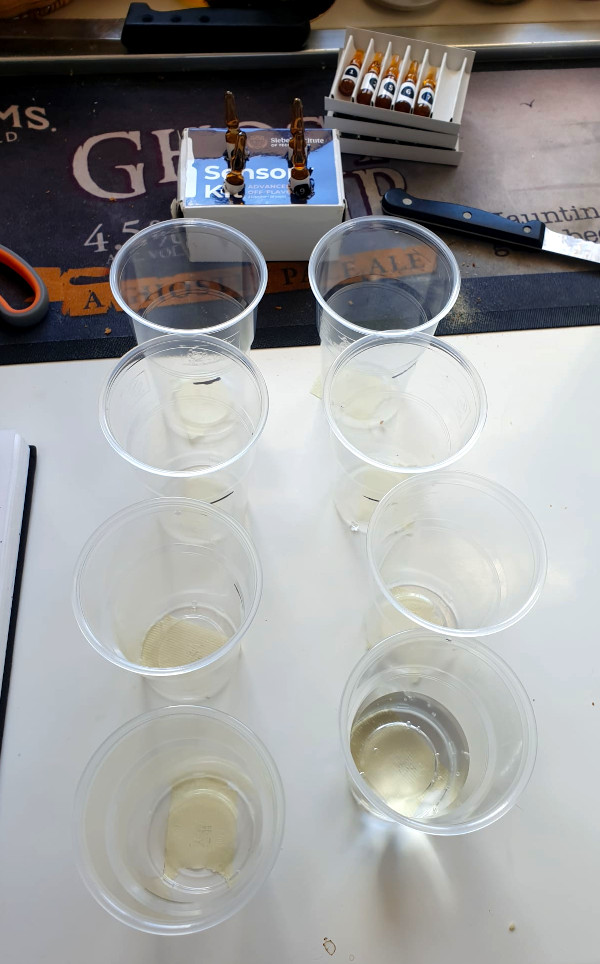
However, while training with the Siebel kit, I realized I had a weak spot: DMS. I was already aware of it, but my last training session, held the day before the exam, strongly confirmed it.

Needless to say, one of the three flaws in the exam was DMS. I immediately identified two of the three flawed samples and set them aside. That left two glasses to evaluate: one contained the third flaw, the other was identical to the control sample. I was almost certain the third flaw was DMS simply because I couldn’t perceive anything off in either of them.
Knowing my weakness, that very absence of any obvious character was, in itself, a clue. Furthermore, the test provided a list of possible off-flavours to choose from, and DMS was among them. This reinforced my hypothesis: if I couldn’t perceive the remaining flaw, it was highly likely to be the one I knew I struggled with most.
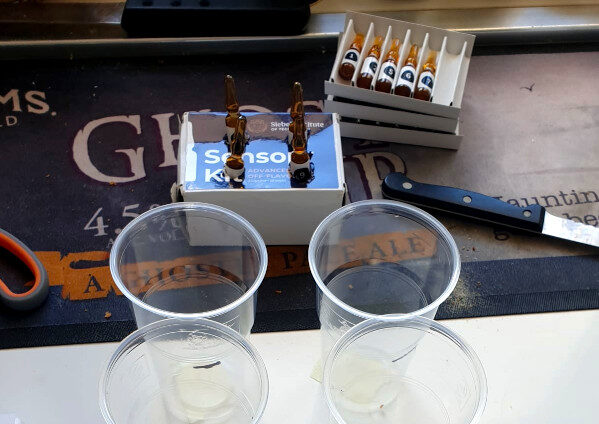
However, I still had to determine which of the two glasses was the flawed one and which corresponded to the control. At first, I thought about marking both as reference samples. This way, I would have guaranteed that I only got one glass wrong; otherwise, by giving two different answers, I would have risked swapping them and getting both wrong.
I decided not to overthink it and moved on to the rest of the exam, leaving the final decision for the last few minutes. After comparing the two samples with the reference multiple times, I finally managed to identify the flawed one. I still couldn’t perceive the DMS, but the only options left were DMS and papery (oxidized). Since I recognize papery quite well, I marked the sample as DMS and handed in my paper.
It turned out right.
Reharsing with the Siebel kit the day before the exam and working alone on different samples was a huge help. Not so much because it magically helped me recognize DMS, but because it allowed me to become fully aware of my weak spot and manage it as rationally as possible during the exam.
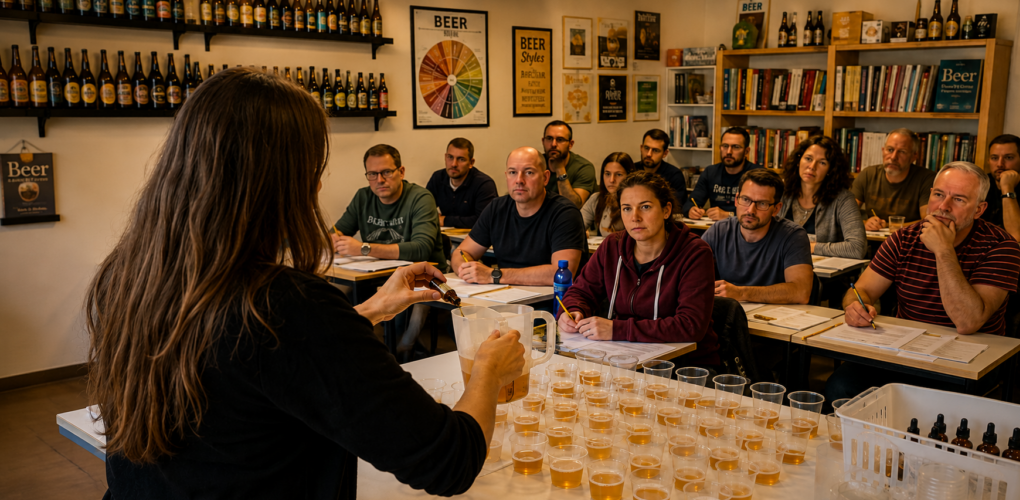
Here’s a post on how to dose Siebel flavor standards into different glasses using a laboratory pipette (the post is in italian).
Mastering the nuances: how to identify beer styles
The second part of the exam might seem fairly straightforward. It involves recognizing the style of each of the four beer samples served for tasting, choosing from the two options provided for each sample.
The style pairings in the sample test don’t seem that difficult at first sight: surely I can tell a Doppelbock from a Brown Ale, right? Or a Belgian Dubbel from a Strong Scotch Ale?
Yeah, sure. But not.
One must be careful, because blind tastings always reveal unpredictable pitfalls. When you are too confident in your ability to recognize a beer’s characteristics blind, it’s usually because you’ve never tried doing it seriously.
Take the Doppelbock vs. Wee Heavy example: I encountered a similar one during my exam. On paper, these are quite different beers: the former is a bottom-fermented lager, the latter is an ale. You’d think this difference would be instantly noticeable, wouldn’t you? Well, I wish. It isn’t always the case.
The fruitiness of roasted malts can play nasty tricks on the nose. Both beers are characterized by crystal malts, even if in the first case they are not English crystal malts, but most likely German ones like Caramunich, produced using a slightly different process. However, the aromatic impact in the finished beer remains very similar.
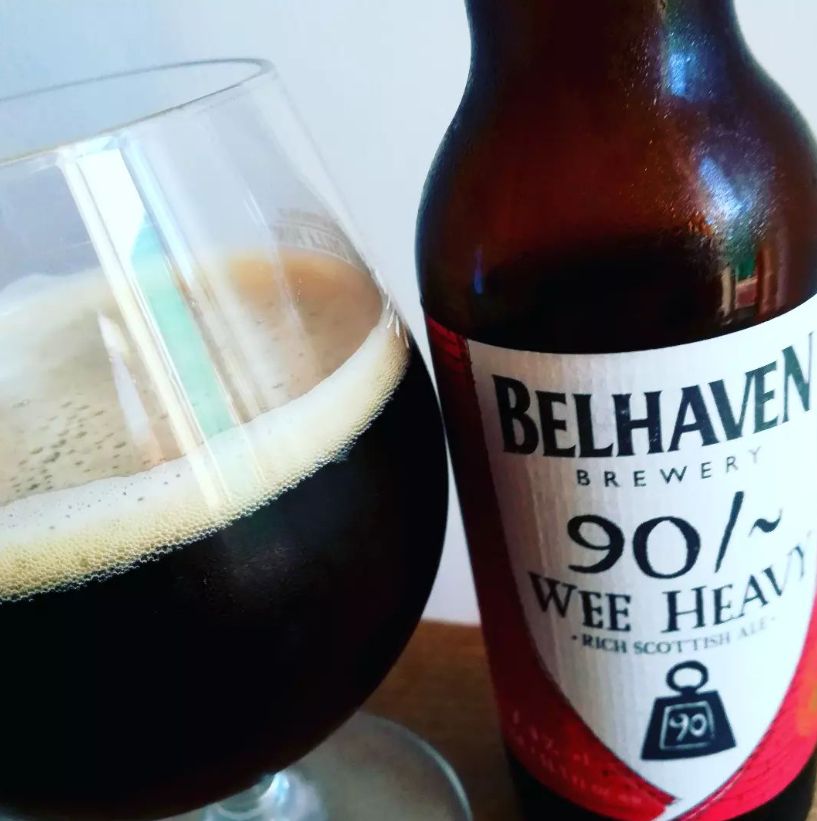
Doppelbocks, even though they are bottom-fermented, can release slight esters. High initial gravity puts the yeast under stress, leading to an increase in fruity aromas—which are already quite intense due to the toasted malts.
To avoid making mistakes during the exam, it is better to focus on other details rather than relying on your ability to instantly recognize the fermentation type.
If fruity esters are not evident—often because they are masked by the malt-derived fruitiness—you’ll need to look for other clues. Doppelbocks are generally drier, with a less dense and full-bodied malt finish. They usually show higher carbonation compared to a classic Scotch Ale. These are elements that are sometimes easier to isolate than fruity esters.
When comparing a Dubbel with a Brown Ale, useful style markers are clarity and carbonation. Since the beers are poured into pitchers for the exam, a bit of yeast is bound to make it into the Dubbel sample, resulting in some level of haze. Brown Ale style examples are filtered and show up crystal clear in the glass. Moreover, the carbonation will be higher in the Dubbel.
If you think it’s easy and immediate to distinguish these style pairings solely by the impact of fermentation on the aroma, you are wrong. Guaranteed.
Trying the kit’s off-flavours on other beer styles is a good idea
The last part of the exam is, in some way, similar to the first: it requires assessing whether a beer is fit for service, which comes down, again, to identifying off-flavours. Compared to the first question, however, in this case it is required to indicate the potential cause of the identified off-flavour.
There is, however, another rather important element that makes this question different from the first: while in the first question the base beer is a very bland lager, free of off-flavours, to which the off-flavour vials are then added, in this third question the beers can be of any style. There is no control sample to rely on.
It may seem trivial, but it is precisely this aspect that makes the last question fairly tricky even for the most experienced palates. Diacetyl, for example, can manifest very differently in a lager compared to a stout. The same goes for acetic acid, or wet cardboard.
Furthermore, it is not required to assess whether the beer is to style or not, although the style of each of the four beers is declared. In my exam, for example, one of the four beers was extremely sweet compared to the declared style. It was, however, clean, without off-flavours. This misled some other candidates, who marked it as flawed (some marked it as oxidized, others detected diacetyl).

My advice for training for this part of the exam is to try the Siebel kit with other beer styles, not just with a light, neutral base beer. This can easily be done using a laboratory pipette to dose the vials, as I have done in the past.
Well, this goal has been achieved too! Is it time to start preparing for Level 3, the Advanced Cicerone® certification? I’m not sure—we’ll see. For now, I’m going to take a little break and enjoy the satisfaction of reaching this new milestone.

Certified Cicerone®: strategie per il Tasting Exam
Questa prima avventura con il Cicerone® si è conclusa: i risultati del Tasting & Demo Exam mi hanno conferito ufficialmente la qualifica di Certified Cicerone®, con un punteggio complessivo del 96%.
Questo articolo è dedicato alla sezione Tasting del Tasting & Demo Exam, nella quale ho ottenuto un 100% pieno! Per approfondire come affrontare l’intero percorso della Certified Cicerone Certification, ho raccolto guide, consigli e risorse in una sezione dedicata del blog.
Questa parte dell’esame non è stata difficilissima, ma nemmeno immediata. Sicuramente ho capitalizzato sull’esperienza acquisita negli ultimi anni, parte della quale consolidata grazie agli esami BJCP. Ho anche ripassato per bene i difetti e mi sono allenato per la piccola dimostrazione orale. Comunque, è andata bene. Molto bene.
Vediamo quali sono stati i passaggi più critici dell’esame Tasting & Demo e come affrontarli al meglio.
Riconoscere i difetti gestendo i propri limiti
Per prepararsi alla prova di riconoscimento dei difetti del Tasting Exam, ci si può allenare facilmente con i kit base di Aroxa o Siebel. Non sono economici, ma l’investimento ripaga. Dopo un po’ di pratica, riconoscere la maggior parte dei difetti in una birra chiara e neutra non è particolarmente difficile.
Allenandomi con il kit Siebel mi sono però reso conto di avere un punto debole: il DMS. Ne ero già consapevole, ma l’ultima sessione di allenamento, fatta il giorno prima dell’esame, me lo ha confermato.
Il primo blocco del Tasting Exam prevede l’assaggio di quattro campioni: tre sono difettati, uno no. Viene servito a parte anche un campione di controllo. In pratica ci si trova davanti a cinque bicchieri: tre contengono difetti, mentre gli altri due sono identici e privi di difetti. Uno di questi è chiaramente identificato come campione di controllo.
All’esame, manco a dirlo, uno dei tre difetti era proprio il DMS. Ho subito riconosciuto due dei tre campioni difettati e li ho messi da parte. Rimanevano due bicchieri da valutare: uno conteneva il terzo difetto, l’altro era identico al campione di controllo. Ero quasi certo che il difetto fosse il DMS perché, semplicemente, non riuscivo a percepire nulla di anomalo in nessuno dei due.
Conoscendo il mio punto debole, proprio quell’assenza di qualsiasi carattere evidente era già un indizio. Inoltre, il test forniva un elenco di possibili difetti tra cui scegliere, e tra questi figurava proprio il DMS. Questo rafforzava la mia ipotesi: se non riuscivo a percepire il difetto che rimaneva da identificare, era molto probabile che fosse proprio quello che sapevo di riconoscere con maggiore difficoltà.
Restava però da stabilire quale dei due bicchieri fosse quello difettato e quale corrispondesse al campione di controllo. In un primo momento ho pensato di indicare entrambi come controllo. In questo modo avrei avuto la certezza di sbagliare un solo bicchiere; assegnando invece due risposte diverse, avrei rischiato di invertirle e sbagliarle entrambe.
Ho preferito non intestardirmi e proseguire con il resto dell’esame, rimandando la decisione agli ultimi minuti. Dopo aver confrontato più volte i due campioni con il controllo, sono riuscito a capire quale dei due fosse quello difettato. In realtà continuavo a non percepire il DMS, ma tra le opzioni disponibili erano rimasti solo DMS e cartone bagnato. Quest’ultimo, però, lo riconosco piuttosto bene, quindi ho indicato il campione come DMS e ho consegnato.
È andata bene.
Ripassare con il kit Siebel il giorno prima dell’esame, lavorando da solo su diversi campioni, mi è stato di grande aiuto. Non tanto perché mi abbia fatto riconoscere il DMS, quanto perché mi ha permesso di prendere piena consapevolezza del mio punto debole e di gestirlo nel modo più razionale possibile durante l’esame.
Qui un mio articolo su come dosare i difetti Siebel in bicchieri di diverso formato utilizzando una pipetta da laboratorio.
Valutare ogni singolo dettaglio per risonoscere gli stili
Da una prima occhiata veloce al sample test del Tasting Exam, la seconda parte della prova potrebbe sembrare abbastanza semplice. Si tratta infatti di riconoscere lo stile di ciascuno dei quattro campioni di birra serviti in assaggio, scegliendo tra i due proposti per ogni campione.
Le coppie di stili del sample exam non sembrano così difficili a prima vista: vuoi che non sappia distinguere una Doppel da una Brown Ale? O una Doppelbock da una Strong Scotch Ale?
Bisogna fare attenzione, perché gli assaggi alla cieca rivelano sempre insidie non pianificabili. Quando si ha troppa confidenza nella propria capacità di riconoscere le caratteristiche di una birra alla cieca, è perché non si è mai provato a farlo seriamente.
Prendiamo l’esempio Doppelbock vs Wee Heavy: me ne è capitato uno simile all’esame. Sulla carta sono birre piuttosto diverse: la prima è una bassa fermentazione, la seconda una alta. Vuoi che questa differenza non si riesca a cogliere all’istante? Eh, magari. Non è sempre così.
Il fruttato dei malti tostati può giocare brutti scherzi. Entrambe le birre sono caratterizzate dai malti crystal, anche se nel primo caso non sono crystal inglesi: si tratta molto probabilmente di crystal tedeschi come il Caramunich, prodotti con modalità leggermente differenti. L’impatto aromatico nella birra finita, però, resta molto simile.
Le Doppelbock, anche se fermentate con lieviti a bassa fermentazione, possono rilasciare leggeri esteri. L’alta densità iniziale mette il lievito sotto pressione, con un aumento degli aromi fruttati, già piuttosto intensi per via dei malti tostati.
Per non sbagliare, conviene concentrarsi su altri dettagli piuttosto che fare affidamento sulla propria capacità di risonoscere al volo il tipo di fermentazione.
Se gli esteri fruttati non sono evidenti, spesso perché coperti dal fruttato dei malti, servono altri riferimenti. Le Doppelbock sono in genere più secche, con un finale maltato meno denso e pieno. Risultano generalmente più carbonate rispetto a una classica Scotch Ale. Sono elementi a volte più facili da isolare rispetto agli esteri fruttati.
Nel confronto Dubbel vs Brown Ale, i riferimenti utili diventano limpidezza e carbonazione. Le birre d’esame vengono scaraffate: nella caraffa della Dubbel finirà sicuramente un po’ di lievito, che la renderà più o meno velata. Gli esempi di stile delle Brown Ale sono filtrati e limpidissimi. La carbonazione, infine, sarà più alta nella Dubbel.
Se pensate che sia facile e immediato distinguere queste accoppiate di stili dal solo impatto della fermentazione sull’aroma, sbagliate. Garantito.
Provare i difetti dei kit su altri stili di birra è una buona idea
L’ultima parte dell’esame è, in qualche modo, simile alla prima: viene richiesto di valutare se una birra è idonea al servizio, il che si riconduce all’individuazione dei difetti. Rispetto al primo quesito, però, in questo caso viene richiesto di indicare la potenziale causa del difetto individuato.
C’è però un altro elemento, piuttosto importante, che rende questo quesito diverso dal primo: mentre nel primo la birra base è una lager molto blanda, priva di difetti, in cui poi vengono aggiunte le fialette dei difetti, nel terzo quesito le birre possono essere di qualsiasi stile. Non c’è un sample di controllo.
Sembra una banalità, ma è proprio questo aspetto a rendere l’ultimo quesito abbastanza ostico anche per i palati più esperti. Il diacetile può manifestarsi in modo molto diverso in una lager rispetto a una stout, per esempio. Ma anche l’acetico, o il cartone bagnato.
Inoltre, non viene chiesto di valutare se la birra è in stile oppure no, sebbene lo stile di ciascuna delle quattro birre sia dichiarato. Nel mio esame, ad esempio, una delle quattro birre era estremamente dolce rispetto allo stile dichirato. Era tuttavia pulita, senza difetti. Questo ha ingannato qualcuno che l’ha segnata come difettata (alcuni l’hanno segnata come ossidata, altri hanno sentito diacetile).
Il mio consiglio, per allenarsi a questa parte dell’esame, è provare il kit Siebel su altri stili, non solo su una birra base chiara e neutra. Si può gestire facilmente se si utilizza una pipetta per dosare le fialette, come ho fatto in passato.
Bene, anche questo traguardo lo abbiamo portato a casa. È arrivato il momento di iniziare a studiare per l’Advanced Cicerone®? Non lo so, vedremo. Per ora cerco di godermi il meritato riposo.